This section is part of the switcher documentation.
It is recommended to review the documentation on video switcher basics before reading further, as this section will build off of the basics discussed there.
The Ross Carbonite is a video switcher that is used in both permanent and portable Highlands campus environments. All Ross switchers at campuses are single ME switchers that have additional, limited-ME functionalities, which are called MiniMEs. These MiniMEs allow for more transitions and keys to be used. This allows multiple transitions to be possible at once on multiple outputs.
One way that MiniMEs are used, is to display a small video preview of the live service on the confidence monitor.

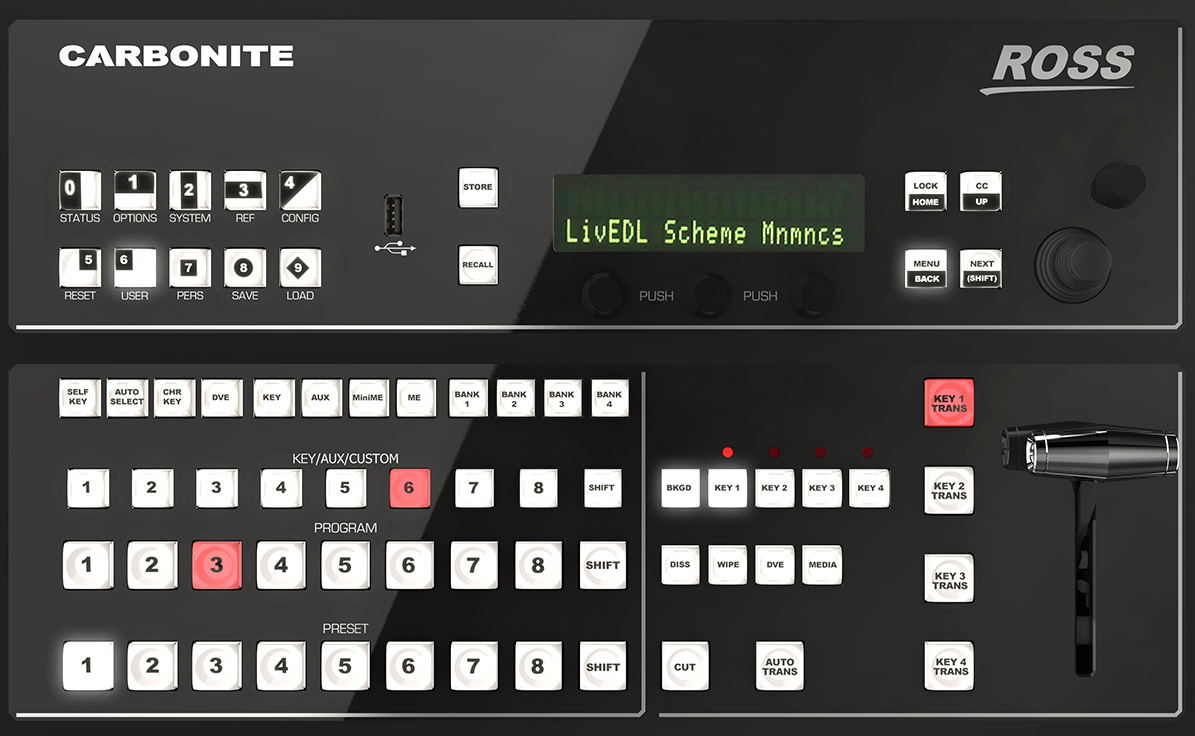
Ross Carbonite Series of Switchers
Although the image above is of the Ross Carbonite Solo, all buttons function the same on all models in the Carbonite family. For simplicity, this manual will reference the Solo model.
The key difference in the Solo and other models: 1.) Customizable LCD labels between KEY/AUX/CUSTOM row; and, 2.) PGM rows and LCD labels between the key on/off buttons.
¶ Outputs
Any source can be routed to an output. To see what is currently routed to an output or change what is routed, press and hold AUX and select an output number using the row of AUX buttons. Once these keys are depressed, the selected input will be lit on the AUX row. To change what is sent to that destination, press a numbered AUX key.
¶ Example
Let’s say the lobby is output 3 and we’d like to send a video camera, located on input 5, to it. To do this, press AUX + AUX 3 (selects the output) and then select AUX 5 (input).
When changing a destination this way, you will be performing a live “CUT” and will no longer be able to transition or send a key to that output. In a typical flow, it would be better to send the PGM/ME source to the output, change your program/preview, and transition to the new source.
¶ Custom Controls / Macros
Ross macros are called “Custom Controls” (CC) and allow for every action to be repeatable with a single button press. CC’s are split across eight banks, which can be selected using the BANK keys.
To use a custom control, ensure you are currently in a bank (the bank key will be lit) and then select one of the CUSTOM buttons to recall the CC.
¶ Editing
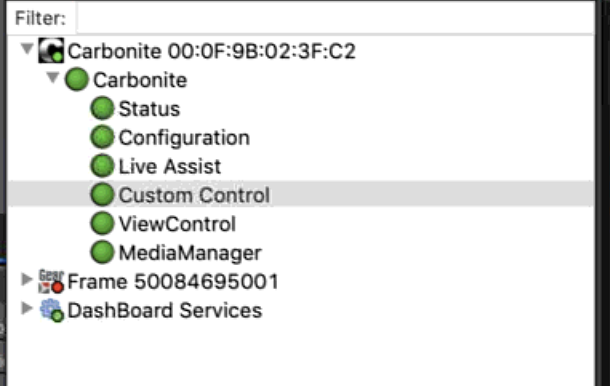
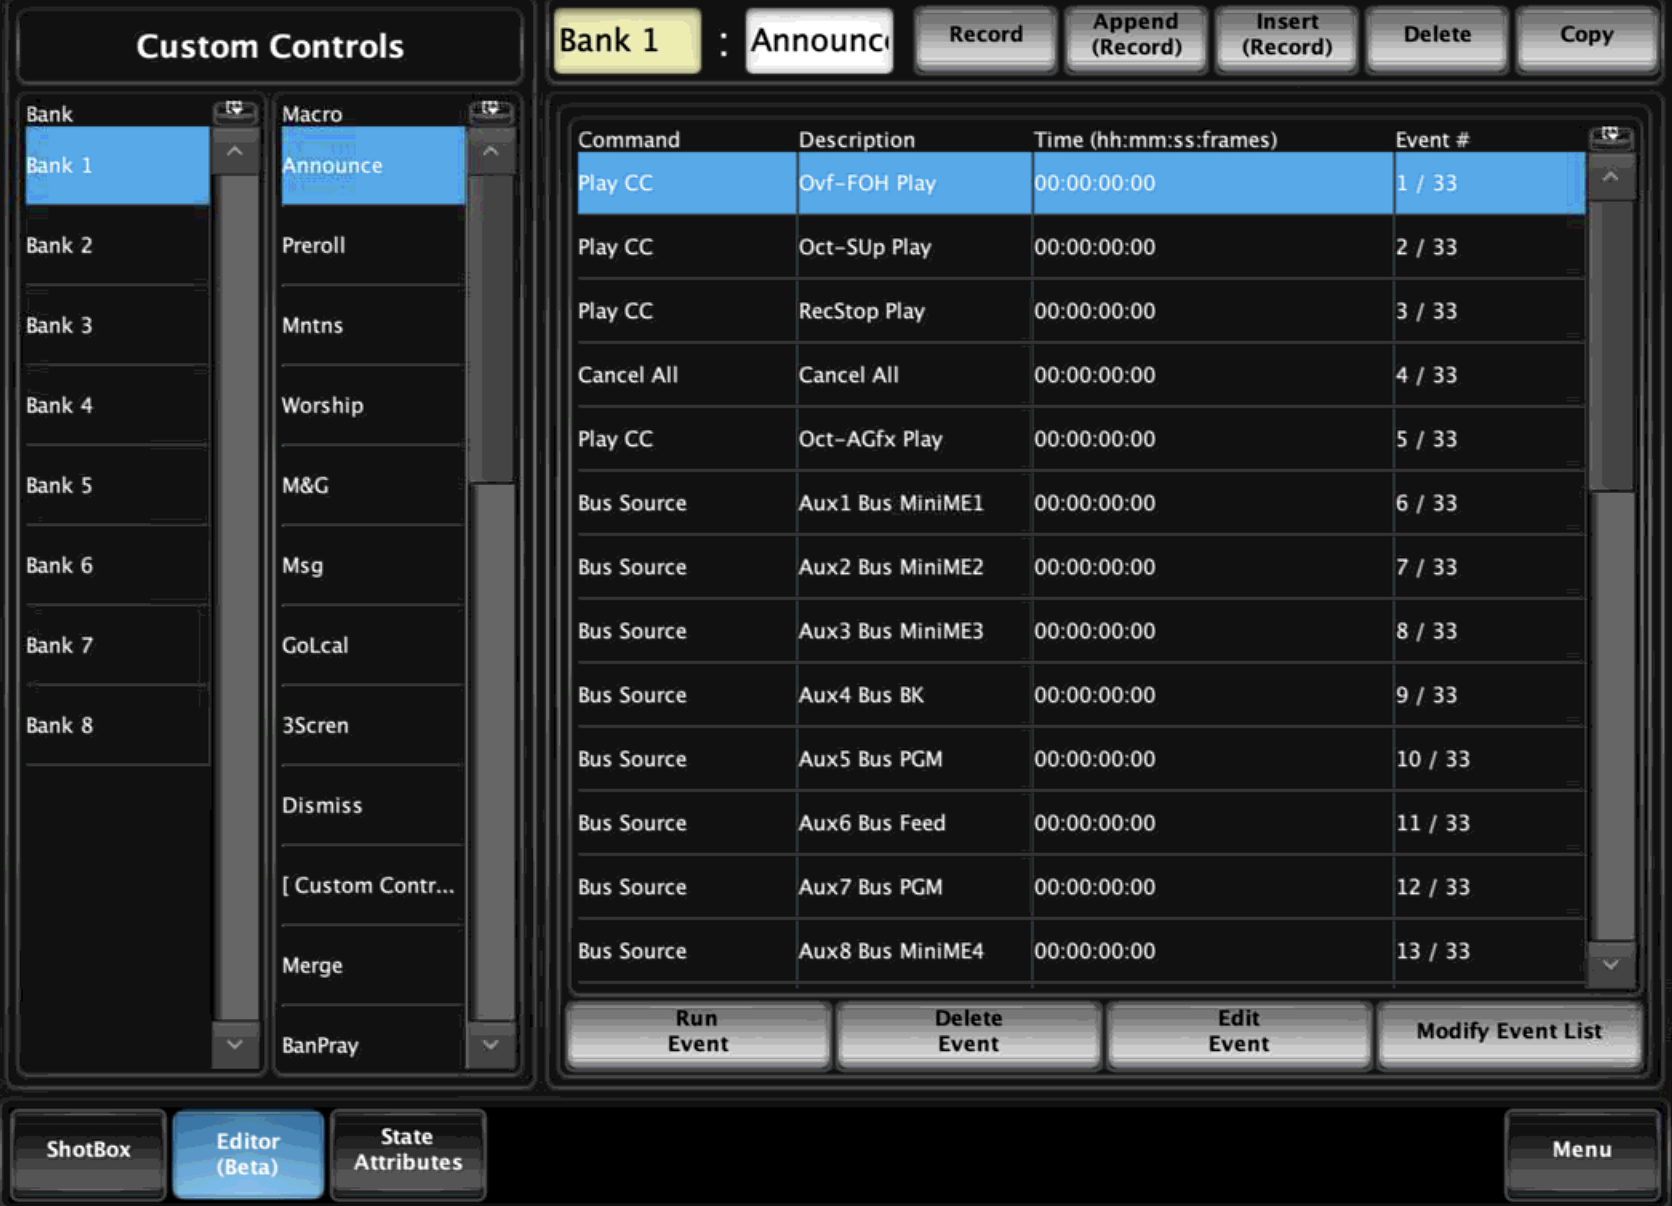
You can edit Custom Controls easily by using the Ross DashBoard software.
Navigate to the Custom Control section of Dashboard.

Using the editor, select the bank and custom control number to edit. You can then edit the list of commands, or add to them.

You can also record, view and edit macros using the switcher control surface. See the Custom Control section of the Ross Carbonite manual for more information.
¶ Keys
To turn a key on- or off-air, select the Key X Trans key on the switcher. This will toggle the key on or off. When the key is on, the key will be red. There are many different types of keys. The most common ones that we use are:
- Auto - Allows a key to use alpha.
- DVE - Allows video to be resized/PIP and moved to a location on screen.
- Chroma Key - Allows for green screens for keying lyrics in certain situations.
For further information, we recommend checking out the Ross Carbonite manual on keying.
¶ Using Next Transition
You can also use the next transition buttons (BKGD, KEY1, KEY2, KEY3, KEY 4), which allows for certain keys to turn on or off using the ME transition controls. For example, to toggle Key 1 and transition to what’s in preset when using the T-bar, select BKGD + Key 1.
When using next transitions, keys will toggle on and off based on transitions, which may not be intended. Be sure to switch back to BKGD when done to switch back to a normal switching method.
¶ Editing
To edit a key, press KEY + X (Solo models) or KEY X SEL (Carbonite). Then select the source (using the AUX keys) and type of key to use, such as DVE. Note that many additional settings can be changed using the control knobs located near the LCD screen along with the Next key.
¶ Automation Using Companion
To setup automations, select: System, Next, Next and then select Device Config using the third selection scroller. Now, using the first selection scroller select <new> Add. Scroll to Slot 0 and change Type to RossTalk, and then press Next, ensure generic is used, then change the IP to that of the computer running Companion, and then select the first scroller again and choose to save it.
Finally, enable RossTalk communication in the settings tab of Companion. You should now have a device connection ready to use.
¶ Additional Reading
The Ross Carbonite switcher has great documentation on their website that can help with more advanced functionality.