This document is written from a ProPresenter 6 perspective. Many of the topics discussed below do apply to later versions of ProPresenter, but the design may be a little different.
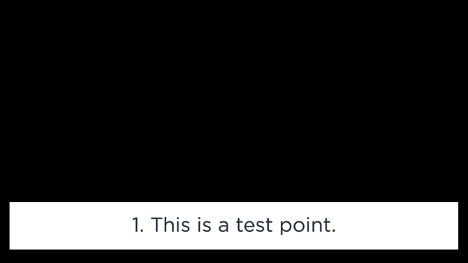
A local speaker may request that you display portions of their notes on screen. This can take two forms: full screen message notes or lower thirds to be used in conjunction with cameras. There are two types of notes: points and scripture. You will get additional information about each type of point in the following sections.
Before you begin, you may want to load the example notes and templates from Dropbox.
¶ Creating Speaking Notes
¶ Creating a new Document
To create a new set of notes, create a new document by clicking in the menu bar File > New.
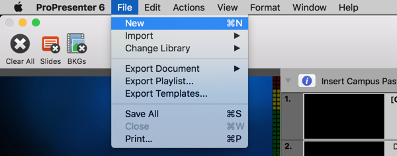
Name the new document in the following format: YYYY-MM-DD [Speakers Name]. Set the category to "Presentation", then select the "New" button.
ProPresenter 7 — Please use the "Campus" library for creating your notes.
¶ Adding Scripture to Your Notes
The Bible module can be opened by pressing “View” in the system toolbar, then selecting “Bibles".
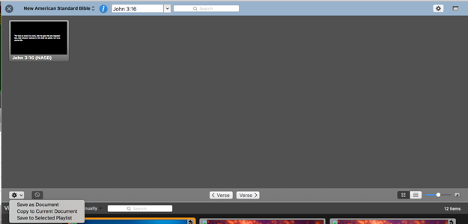
Once the Bibles module is open you will be able to use the navigation bar at the top of the module to chose your translation and scripture reference. Now that you have entered the scripture reference you wish to add; press the return or enter button, click on the gear button at the bottom left of the editor, and select “Copy to Current Document.”
¶ Using the Editor Tool
The Editor can be opened by pressing “View” in the system toolbar, then selecting “Editor". Once you have entered the editor, you may format slides, create new slides, and edit the content of existing slides. To add additional slides to your document, select the + button at the bottom left corner of the document window if you wish to add a slide using the same template as the document. If you wish to add a slide to the document using a different template, select the down arrow next to the + and select the desired template for the new slide.
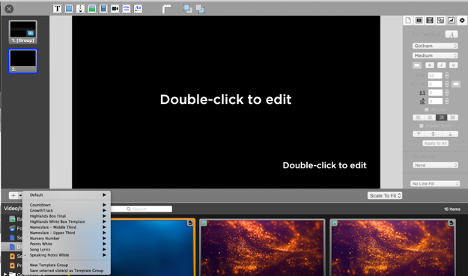
The Text Properties tab at the far right side of the editor should contain all the options you need to create a notes slide. To underline a word or a set of words, highlight what you wish to underline and select the underline button U. Reference the guidelines in the following sections for text formatting as the guidelines differ between full screen and lower thirds notes
¶ Speaking Notes Style Guide
¶ Notes Templates
You can find the notes templates on Dropbox.
This bundle will include both Fullscreen and Lower Thirds tempaltes
It is not recomend to apply a single template to the entire notes document as it likely contains both Scripture and Points that each have there own templates.
¶ Fullscreen Notes
Full Screen Notes should be used any time you are not using cameras.
¶ Scripture
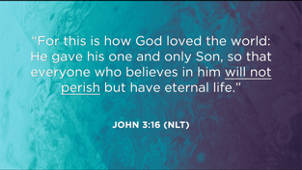
To create fullscreen scripture slides you will first need to apply the Fullscreen Scripture template to the slides you are using for points.
Scripture passages can be quite long and will require some formatting using the editor tool beyond how passages will be formatted by default.
- Individual slides of passage should not exceed four lines of scripture.
- You should create line breaks on punctuation or where there would be a natural break while speaking.
- If you wish to emphasize a word or section use underlining
- There should be a reference for the entire passage on each slide. It should be in ALL CAPS. The translation should be abbreviated and in parentheses.
To move any text beyond your cursor to a new slide press option+return
¶ Points
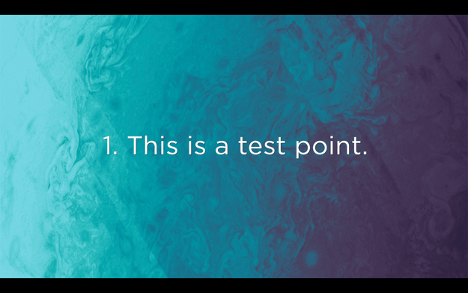
To create fullscreen points slides you will first need to apply the Fullscreen Points template to the slides you are using for points.
Formating
- Points should be presented in Sentence case and only use bullets or numbers.
- To add emphasis to a word or collections of words use underlining.
¶ Lower Thirds
Lower Third Notes should be used anytime you are overlaying notes over a camera shot.
¶ Scripture
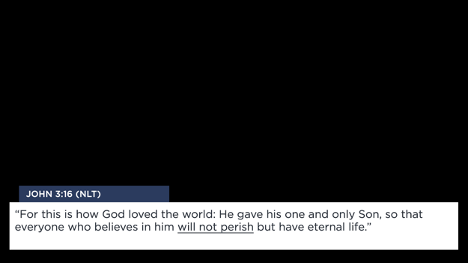
To create lower third scripture slides you will first need to apply the lower third scripture template to the slides you are using for scripture.
Scripture passages can be quite long and will require some formatting using the editor tool beyond how passages will be formatted by default.
- Individual slides of passage should not exceed three lines of scripture
- Individual slides of passage should not exceed three lines of scripture
- If you wish to emphasize a word or section use underlining.
- There should be a reference for the entire passage on each slide. It should be in ALL CAPS. The translation should be abbreviated and in parentheses.
To move any text beyond your cursor to a new slide press option+return
¶ Points
To create lower third points ts slides you will first need to apply the Lower Third Points template to the slides you are using for points.
Formating
- Points should be presented in Sentence case and only use bullets or numbers.
- To add emphasis to a word or collections of words use underlining.
