The one thing that always precedes any audio equipment or musical gear is the space where it will be used is the ENVIRONMENT. We must gain a bit of understanding about our environment and how sound works within it before we can truly understand how to use audio equipment and processes within that environment.
Public Address Environment — One where - without a sound system - the sources will either not be heard or not be heard as intended.
¶ Examples
Examples might include a theater or stadium.
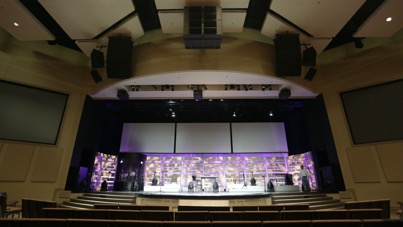

Sound Reinforcement Environment — One where some or all of the sources can be heard (to some extent), but may require some amount of amplification or “reinforcement” to achieve the desired result.
A good example would be a small room with a stage setup for a small band like a coffee shop.
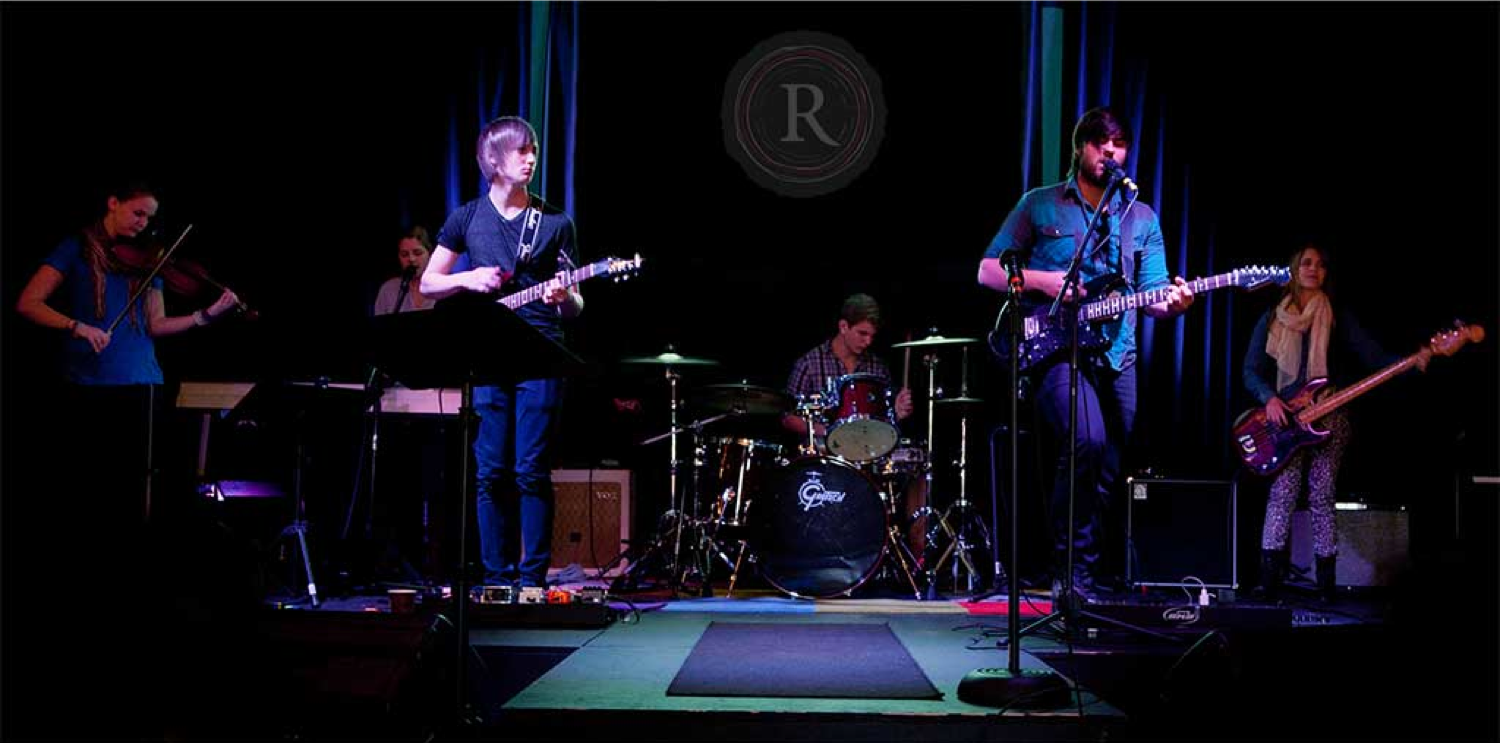
Here is another great example of a Sound Reinforcement Environment - A small church auditorium.
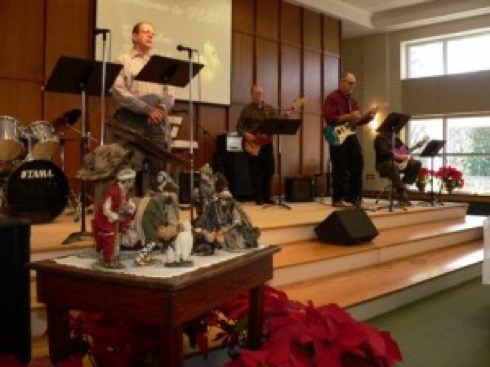
From a Sound Reinforcement perspective, what challenges do you see in the worship setting above?
- Microphone distance from worship leader
- Microphones in front of the drums
- Relationship of music stand to WL microphone
- Wooden floors
- Flat wooden wall behind band (Esp. Drums)
- Open drum set
- Low Ceiling
- Glass Windows/Walls
- Wedge Monitor placement
- Overall, lack of instrument isolation
¶ Audio Pollution
Environmental Audio Pollution — any unwanted or undesirable audio source being introduced into an environment.
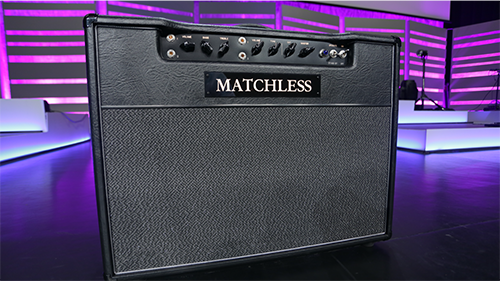
Any sound source that cannot properly be isolated or controlled within its environment can be considered “audio pollution”. Even an Electric Guitar amp could be considered as audio pollution (sorry EG players).
¶ Isolation Techniques
Here are two examples of simple isolation solutions to control/isolate our source to an acceptable level. Other methods of ”control” may be to simply place your amp in another room or closet.
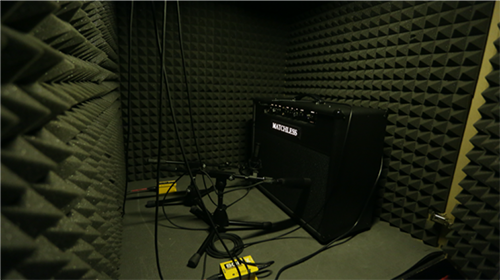
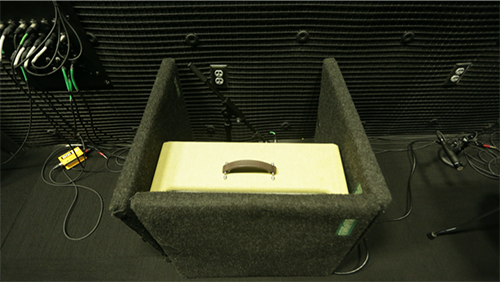
When control is the top priority, a fully enclosed drum tank, as pictured below, is most effective. This enclosure provides 360° of isolation. The results are extremely effective, but requires a large footprint. Enclosures of this nature can be equipped with microphone inputs, lighting connections, and even duct work for air conditioning. Another downside of this solution is that it may be cost prohibitive. The enclosure on the right is a good cost-effective option, but doesn’t offer the same level of isolation.
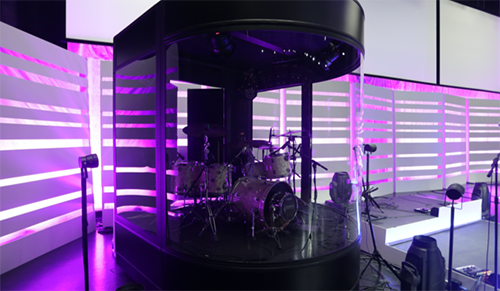
This enclosure (below) is a good cost-effective option, but doesn’t offer the same level of isolation.
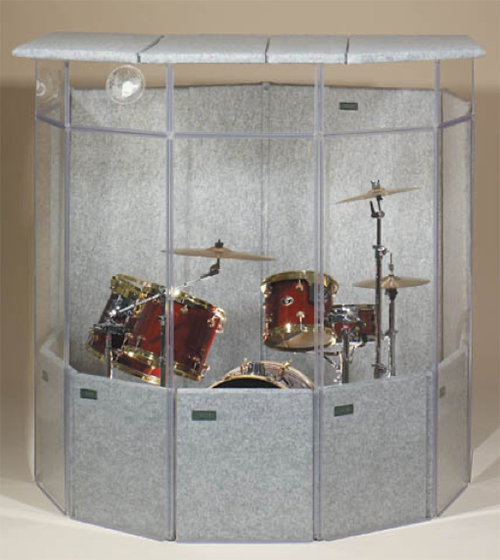
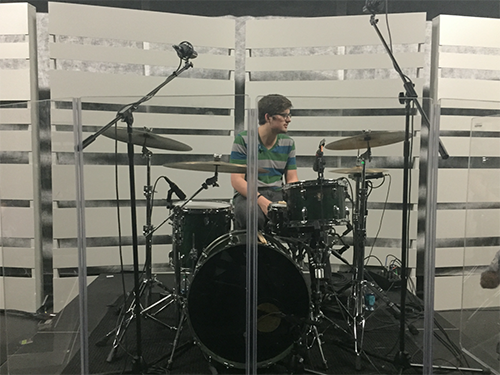
Continuing with drum shields, below is a very basic example. Lets talk a moment about the effectivness of this solution. Notice that the drums are only partially surrounded. This may be adequate in certain situations. However, this arrangement can actually create more problems than it solves. If this setup had a solid hard surface wall behind it, the shield can actually focus reflections to project off of the back wall therefore increasing the very issues that were intended to be controlled.
¶ Monitors
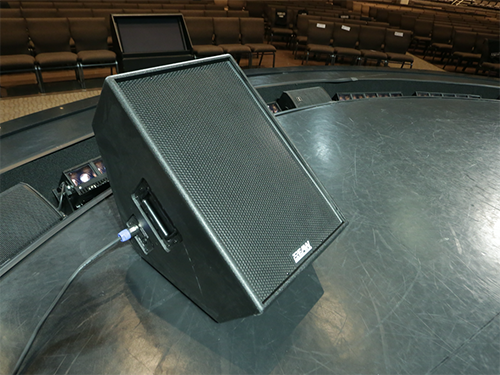 This critter has been the bain of the audio engineer's existance for many decades. Even though it is an extremely useful tool, thankfully we are seeing it's applications greatly reduced in most of our modern worship settings. Beyond the obvious impact of high stage sound presure levels (SPL), the impact can greatly affect a large portion of your audience seating area. Causing an even greater impact is the fact that this bleeds into the seating area with an uneven frequency response.
¶ Theory
Due to the design of a fullrange loudspeaker, all of the intelligibility of the speaker comes from the high and mid frequency drivers, which project from the front of the speaker cabinet. If the low frequency, or bass response of the speaker performed in the same manner, this would not be as much of a problem. However, most speaker cabinets radiate low frequency information 360deg from the enclosure. Therefore, the end result is the addition of additional low frequency drivers without the matching high frequency drivers skewing what the audience is hearing. An additional negative impact may be realized if the sound from the monitor speaker is reflected from the stage wall or ceiling back into the seating area. The resulting delayed signal causes a time-alignment or smearing effect. This effect adds to intelligibility loss.
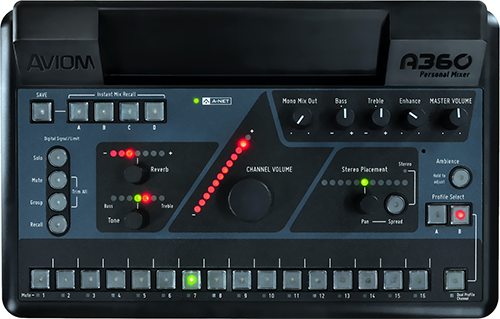
Finally! A solution. Personal Monitor system or In-Ear Monitors (IEM). With the advent of personal monitor systems, not only does each member of the worship team have control of their own mix, they now have the ability to use personalized in-ear monitors (molds). The biggest acoustic impact is the greatly reduced stage volume levels previously experienced with the use of multiple wedge monitor speakers. With the advent of multiple driver IEM, each user has the ability to choose the level of performance and price range they desire. I recall a time while serving at a smaller church, I moved the team from stage monitors to IEMs. From one Sunday to the next, we were able to reduce the SPL from 102 dB at FOH to 96 dB. This was accomplished by simply removing the wedge monitors. Besides the SPL difference, we experienced much improved intelligibility and happier attenders. Personal monitor systems are becoming more advanced while, at the same time, many systems are now very cost effective.
¶ Boundary Surfaces
When a sound wave comes in contact with a boundary surface, it can be:
- Reflected — energy bounces off
- Absorbed — energy is soaked up
- Transmitted — energy is transferred through
Any one or a combination of these things can happen when a sound wave contacts a surface.
In order to understand how we might control or eliminate environmental audio pollution, we must understand what happens to a sound wave when it comes in contact with a surface. Having this understanding, we can choose the best way to manage sound waves that contacts unintended surfaces.
- Is it desirable for a sound wave to reflect off of a surface?
This might cause unwanted reflections.
This might add a bit of desirable ”life” or “space” to our source - Do I need the sound wave to be absorbed?
The source might become too dry or lifeless.
This might be a good way to isolate or deaden the source. - Should I control transmission?
Rarely is it a “negative” to have rooms isolated from transmitted sound.
This might be a good way to isolate unwanted sound waves from entering another space or room.
¶ What can be done to manage these reactions?
¶ Too Reflective
Add soft absorptive wall treatment.
- Install acoustic panels made from fiberglass insulation
- Install thick curtains along walls
- Eliminate parallel surfaces
¶ Too Dead
Remove acoustic treatment or add reflective panels.
- Remove absorptive wall panels ands/or acoustic clouds
- Remove carpeting
- Add some hard surfaces
¶ Reduce Transmission
Add mass, or extra layers of dense material, or break the physical link between the areas.
- Add mass by doubling sheetrock surfaces
- Break the connection between areas by cutting concrete floors
- Build a secondary “free-standing” wall
- Replace hollow core doors with solid doors
¶ Standing Waves
In physics, a standing wave, also known as a stationary wave, is a wave which oscillates in time but whose peak amplitude profile does not move in space. The peak amplitude of the wave oscillations at any point in space is constant with time, and the oscillations at different points throughout the wave are in phase. The locations at which the absolute value of the amplitude is minimum are called nodes, and the locations where the absolute value of the amplitude is maximum are called antinodes.
~ From Wikipedia
So from our definition, what is the real-world result of these occurrences? First, it may help to gain a better understanding of nodes and anti-nodes.
A node is a point along a standing wave where the wave has minimum amplitude.
The opposite of a node is an anti-node, a point where the amplitude of the standing wave is at maximum. These occur midway between the nodes.
~ From Wikipedia
Let’s discuss an example of standing waves. Our medium will be “air” in our given environment (a meeting room with a PA system).
- First generate a 100Hz tone at a reasonable volume, say around 80 decibels.
- Next, walk around the room.
- While walking the room, pay attention to how the level of the 100Hz tone is louder in some places than others. You may even notice that in certain spots, the tone seems to almost/completely disappear.
- You are experiencing nodes and anti-nodes along a standing wave in your environment.
- Where the tone seems to be non-existent is a place along your standing wave where a node exist. This point along the standing wave is created where two identical wave lengths (100 Hz tone) intersect from opposing directions and are out of phase with each other. The result is an attenuation of the 100Hz tone at that spot in the room due to phase cancellation.
- On the other hand, where the tone is greatly exaggerated (loudest), you are experiencing an anti-node. This point along the standing wave is created where two identical wave lengths (100 Hz tone) intersect from opposing directions and are in phase with each other. The increase in level of the 100 Hz tone is due to the opposing waves combining in a positive manner creating a boost or amplified tone.
¶ More External Audio Pollution Sources
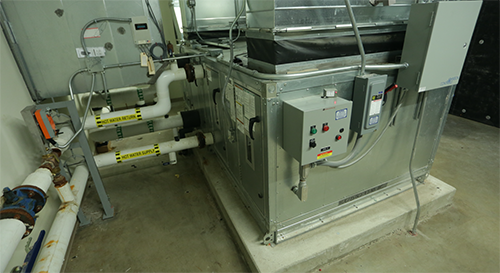 What does this piece of audio gear do?
No. Really. Audio pollution is not limited to our audio and musical equipment. It very frequently is produced from other environmental sources. In this case, an air handling unit of the building’s HVAC system. I don’t think anyone is willing to go back to the days of no air conditioning or heating in our church buildings. So, lets talk a bit about how best to manage some of the negative audio impacts of the building’s HVAC system.
There are 3 main areas where these units produce audio pollution in our environment.
- The mechanical sound produced from these units can be transmitted, through bondaries (walls, floors and ceiling)
- Energy is transferred through physical connection via vibrations through the concrete floor and through the metal duct work.
- The large volumes of moving air can also produce unwanted wind noise or cause diffuser/vent covers to rattle. So, what can be done?
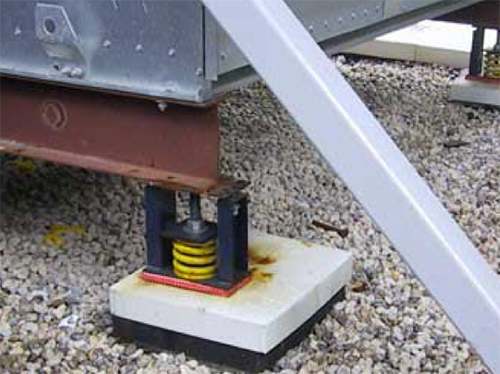
One of the first goals will be to isolate, or break, the physical connection between the air handling unit and the concrete slab on which it sits. This is done by isolating via heavy duty springs or sometimes a simple band of heavy machine rubber.
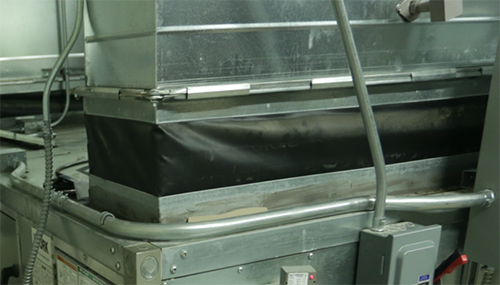
Another practice that has become universal, is physically isolating the main “metal” trunk line from the mechanical air handler by installing a small section of rubber coated canvas duct. This simple step breaks the mechanical vibration transmitted through the duct work, therefore greatly reducing the vibration of transferred mechanical noise. (below)
Finally, the moving air noise itself.
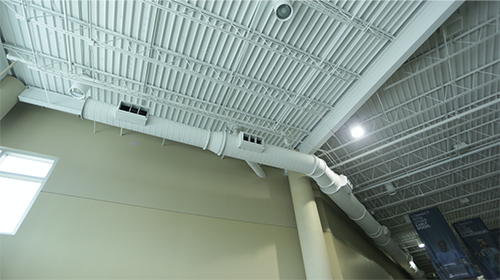
A good idea is to have high volume, yet low velocity air flow. This is accomplished by using large diameter duct work with large output openings. As you reduce or constrict the airflow, the speed, or velocity, of the air will increase. This increased velocity, many times, results in an increase in audible volume. Another good practice is to limit diffusion baffles wherever possible. Many times diffusion baffles are omitted all together in sensitive areas such as over the stage.
¶ Example
Try blowing into your cupped hand, then reducing and widening the size of the opening. Another demonstration is to blow onto the edge of a piece of paper tightly stretched. This will produce a whistling sound. As the speed of the air flow is increased, the volume of the whistling sound increases as well.